How Torque Multiplier Work

Jul 17, 2026 | Hydraulic Expert

How Torque Multipliers Work

Every torque multiplier runs on one mechanical principle: gear reduction turns modest input into massive output.

The driving force behind this is a planetary gear train — also called an epicyclic gear system. Three components do the work:

  • Sun gear — accepts your input torque
  • Planet gears — mesh with the sun gear and orbit around it
  • Ring gear (annulus) — held stationary by a reaction arm

Lock the ring gear, and the planet carrier must rotate. That rotation becomes your output. The reaction arm is not optional. Brace it against a solid point, or the whole system freewheels and delivers nothing.

The ratio shows you what you get:

Input Ratio Output
100 Nm 5:1 500 Nm
100 Nm 25:1 2,500 Nm

The tradeoff is speed. At 56:1, your wrench turns 56 full revolutions to move the fastener one. High torque costs you rotation speed. That’s the deal.

What Is a Torque Multiplier and What Does It Actually Do?

A torque multiplier is a non-powered mechanical gear device. No electricity, no hydraulics, no compressed air. It uses precision gearing to take modest hand-tool input and push out torque your arms could never reach on their own.

The math is straightforward. A typical adult generates 100–200 Nm of controlled torque on a standard wrench. Industrial fasteners — pipeline Flanges, heat exchanger bolts, wind turbine hubs — demand 2,000 to 12,500 Nm. That gap won’t close with a longer lever. A 1-meter lever at 200 N gives you 200 Nm. To hit 2,000 Nm that way, you’d need 10 meters of leverage or 200 kg of force. Neither is practical. Neither is safe.

A torque multiplier closes that gap.

The Numbers That Matter

The device works through one or more planetary gear stages. Each stage multiplies torque by about 5×. Stack the stages, and the ratios scale fast:

  • 5:1 — 150 Nm in, ~675 Nm out
  • 25:1 — 100 Nm in, ~2,300 Nm out (after ~8% friction loss)
  • 125:1 — 150 Nm in, ~16,800 Nm out

That 25:1 example is worth a closer look. One hundred Newton-meters — the kind of torque any mechanic applies with ease — exits the tool as 2,300 Nm. Enough for large Flange bolts. Delivered by hand. No Pump, no power source.

Friction losses are real. Expect 5–20% depending on design and ratio. Factor that into your input calculation before you start. Take a 4:1 tool rated at 1,000 ft·lb with a 20% loss warning — ideal math gives 1,100 ft·lb, but friction brings it to a usable ~880 ft·lb. The rating already accounts for that.

Heavy industrial planetary multipliers reach up to 50,000 Nm output. Portable field units cap around 10,000–12,500 Nm. Input drives accept standard 1″, 1½″, or 2½″ square drives, covering M30–M64 bolts.

The Core Principle: Mechanical Advantage Through Gear Reduction

Gear reduction doesn’t create energy. That’s the first thing to understand — and it’s what makes everything else make sense.

Take a torque multiplier that turns 100 Nm of input into 500 Nm of output. No new energy entered the system. The physics is clear: power in equals power out (minus friction losses). What changes is the form that power takes. The gear train shifts it — swapping rotational speed for rotational force, in exact proportion.

The relationship is straightforward:

Output torque = Input torque × Gear Ratio

Output speed = Input speed ÷ Gear Ratio

A 5:1 gear stage means a 10-tooth driver meshes with a 50-tooth driven gear. Torque multiplies by 5. Speed divides by 5. Both numbers move together — always in opposite directions. You can’t change one without changing the other.

The Tradeoff Is the Point

This speed–torque exchange isn’t a flaw in the design. It is the design.

Stack multiple gear stages and the ratios compound fast:

Stages Overall Ratio Torque Multiplied Speed Divided
1 stage 5:1
2 stages 25:1 25× 25×
3 stages 125:1 125× 125×

Quality gearboxes run at 80–97% real-world efficiency. A 25:1 tool at 92% efficiency gives you 23× usable torque. That’s not the theoretical ceiling — but it’s far beyond what any lever setup can match in the same hand-sized package.

That’s why gears beat levers and hydraulics for portable tools. A 10:1 mechanical advantage from a lever arm needs the handle to be 10 times longer than the load arm. Gears hit the same ratio with a 10-tooth pinion driving a 100-tooth gear. The whole thing sits enclosed, coaxial, inside a cylinder no wider than 40–60 mm.

Inside the Tool: How the Planetary Gear Train Is Built

Crack open a torque multiplier gearhead and you’ll find something that looks simple — a tight cluster of gears lined up on one axis, each one doing its job.

Every planetary stage is built from four members. The sun gear sits at the center — 10 to 18 teeth, cut from carburized steel like 16MnCr5, press-fitted or spline-coupled to the input shaft. Around it, three planet gears orbit at equal spacing. Each one mounts on a hardened pin in the carrier plate. Their tooth counts follow a fixed rule: Z_ring = Z_sun + 2 × Z_planet. Break that relationship and the gears bind. The ring gear forms the outer wall — 30 to 60 internal teeth machined into the housing itself. The reaction arm holds it dead still. The planet carrier collects the output from the orbiting planets and passes it to the output shaft.

All three major parts share one centerline — sun gear, carrier, and ring gear. This coaxial layout is the key design choice. It keeps the whole assembly inside a Cylinder 30 to 50 mm wide, no matter how much torque passes through it.

Stage on Stage: How Ratios Stack

One stage gives you a 5:1 reduction (Z_sun = 12, Z_ring = 48 → ratio = 1 + 48/12 = 5). Add a second stage in series and that jumps to 25:1. The output carrier of the first stage drives the sun gear of the next. A short spline connects them — no extra hardware needed.

Precision here matters at the micron level:

  • Ring gear bore roundness: ≤0.02–0.05 mm
  • Planet pin position, concentric to housing bore: 0.01–0.03 mm

Push past those tolerances and load stops spreading across all three planets. Tooth stress spikes. The gearhead fails ahead of schedule.

That tight tolerance isn’t over-engineering. It’s the reason a hand-sized torque multiplier handles tens of thousands of Newton-meters and keeps going.

Step-by-Step: How Torque Gets Multiplied During Use

Watch what happens inside the gearhead as you apply force — the sequence is fast, mechanical, and exact.

1. Input torque enters the sun gear.
Your wrench drives the input shaft. The sun gear turns.

2. The planet gears receive that rotation.
Each planet meshes with the sun gear and starts to spin. But here’s the catch — they also mesh with the ring gear surrounding them. They can’t spin in place. The ring gear won’t let them.

3. The reaction arm holds the ring gear still.
This is the hidden key. The reaction arm braces against a fixed surface and locks the ring gear. That one constraint changes everything. Without it, the ring gear spins free. The gearset freewheels. Output torque drops to almost nothing. The restraint is the multiplication.

4. The planets are forced to walk.
Each planet gear can’t spin in place anymore. So it gets pushed to orbit around the inside of the ring gear — like a ball rolling along the inside of a drum. All three planets do this at the same time.

5. The carrier collects the output.
The orbiting planets drive the planet carrier around its axis. That’s your output shaft rotating. Slower than the input. Much slower at high ratios. But carrying far more torque.

6. The math locks it in.

Output Torque = Input Torque × Gear Ratio × Efficiency

With an 80-tooth ring and 20-tooth sun: ratio = (80 + 20) ÷ 20 = 5:1. Put in 100 Nm — you get 500 Nm out, minus friction.

Why Three Planets Beat One Gear

A single gear mesh puts all the load at one contact point. Three planet gears split that load across three mesh points at once. Force spreads out. Stress per tooth drops. The same compact housing handles torque that would break a simpler design.

That’s not a small gain. Planetary gearboxes pack 3 to 5 times the torque density of conventional helical gearboxes at the same physical size. That’s why a torque multiplier fits in your toolbag and still puts out forces no lever could come close to.

Torque Multiplication Ratios: How to Read, Calculate, and Use Them

The number stamped on the side of a torque multiplier — 5:1, 25:1, 125:1 — is not decorative. It is a contract. Read it wrong, and you either under-torque a critical fastener or snap a stud. Read it right, and every calculation that follows becomes mechanical, repeatable, and exact.

What the Ratio Tells You

The multiplication factor printed on a torque multiplier shows the theoretical torque ratio — ideal output divided by input, before friction takes its cut.

A 25:1 unit means two things:
– Every 25 input turns produces 1 output turn
– Every 100 Nm you put in produces 2,500 Nm at the output in theory

That’s the theory. Real gearboxes have friction. A well-built planetary multiplier runs at 90–95% efficiency. Use η = 0.92 as your working value for a 25:1 multi-stage unit.

The Formula You’ll Use Every Time

Output torque = Input torque × Ratio × Efficiency

T_out = T_in × R × η

Run the 25:1 example through it:

Variable Value
Input torque 100 Nm
Ratio 25
Efficiency (η) 0.92
Output torque 2,300 Nm

That 200 Nm gap between ideal (2,500 Nm) and real (2,300 Nm) is your 8% friction loss. On precision-critical joints, that gap matters.

How Multi-Stage Ratios Stack

Two 5:1 stages in series don’t add — they multiply:

R_total = R₁ × R₂ = 5 × 5 = 25:1

Efficiency stacks the same way. Each stage runs at 96% efficiency:

η_total = 0.96 × 0.96 = 0.9216 ≈ 0.92

Running the numbers stage by stage confirms it:
1. After Stage 1: 100 Nm × 5 × 0.96 = 480 Nm
2. After Stage 2: 480 Nm × 5 × 0.96 = 2,304 Nm

The combined formula gives the same answer: 100 × 25 × 0.9216 = 2,304 Nm. Both paths land in the same place.

Setting Your Torque Wrench

Never set the wrench to your target output torque. Set it to the required input torque.

The Bahco procedure is clean and direct:
1. Take your required output torque (bolt spec)
2. Divide by the calibrated multiplication factor from the certificate
3. Set your wrench to that number — done

T_wrench = T_required ÷ M_calibrated

No calibrated factor on hand? Use the nominal ratio and fold in your efficiency estimate:

T_wrench = T_required ÷ (R × η)

Example: Need 2,300 Nm. Ratio = 25. η = 0.92.

T_wrench = 2,300 ÷ (25 × 0.92) = 2,300 ÷ 23 = 100 Nm

Ratios Aren’t Always Consistent

A 4:1 multiplier with a nominal rating may deliver an effective ratio between 3.2 and 3.6 across real-world units. That spread changes your calculation. Pick your number based on what you’re protecting:

Guaranteeing minimum torque (won’t under-tighten): calculate using 3.2 as your factor

Capping maximum torque (won’t over-tighten): calculate using 3.6

Choose the conservative number based on which failure mode costs more.

Quick Reference: Three Calculations, One Table

Situation Formula
Required wrench setting (calibrated factor) T_wrench = T_req ÷ M_cal
Required wrench setting (nominal + efficiency) T_wrench = T_req ÷ (R × η)
Expected output from known input T_out = T_in × R × η
Multi-stage total ratio R_total = R₁ × R₂ × … × Rₙ
Multi-stage total efficiency η_total = η₁ × η₂ × … × ηₙ

The ratio is the multiplier’s promise. Efficiency is the honest correction to that promise. Together, they give you a number you can torque to with confidence.

Types of Torque Multipliers and Their Internal Differences

Not all torque multipliers are built the same. The housing might look similar — a chunky cylinder with a drive on each end — but crack one open and the internals tell a different story. What’s inside depends on what the tool was built to do.

Cylindrical Planetary Multipliers: The Standard Design

Most torque multipliers on the market use a planetary gear train inside a cylindrical housing. Sun gear, planet gears, ring gear, planet carrier — the same core architecture, repeated across one, two, or three stages based on how much multiplication you need.

Stage count drives every other specification:

Configuration Ratio Body Length Output Drive Max Output
Single-stage ~4–5:1 150–200 mm 3/4″ ~2,000 Nm
Two-stage ~25:1 220–280 mm 1″ ~10,000 Nm
Three-stage ~125:1 300–380 mm 1-1/2″ or larger ~50,000 Nm

Each stage added in series does more than extend the housing. It multiplies the ratio, boosts the output torque, and cuts the output speed again. A wrench cycling at 30 rpm drives a single-stage unit’s output at 6 rpm. Feed that same input into a three-stage 125:1 unit and the output drops to 0.24 rpm — about one full revolution every four seconds. You feel it right away. The socket moves very little. The bolt moves even less. But the force behind it is enormous.

What this looks like in real input numbers:

To reach 2,500 Nm output: – Through a 5:1 unit — you need 500 Nm of input. That’s a large torque wrench pushed near its limit. – Through a 25:1 unit — you need 100 Nm. A standard hand wrench handles that with ease. – Through a 125:1 unit — you need just 20 Nm. A light wrench. Very little effort. But slow.

The ratio isn’t just a torque figure. It tells you how the tool is meant to be used.

Plate-Type Multipliers: A Different Internal Architecture

Cylindrical planetary units are the most common design — but not the only one. Plate-type torque multipliers — sometimes called torque transmission plates — use a different internal setup.

Cylindrical units rely on planetary gearing. Plate-type units use a fixed-axis gear train instead. The input and output shafts are non-concentric — offset from each other in an eccentric layout. The whole unit sits inside a low-profile plate housing, often under 80 mm thick.

That flat geometry solves one specific problem: confined flange environments where a cylindrical multiplier won’t fit. Tightly spaced flange bolts on pressure vessels, pipeline Flanges, and heat exchangers leave almost no radial clearance. A plate-type unit slides in flat. The output engages the stud through a hollow square or hex pass-through.

The reaction system works differently too. A standard cylindrical unit braces a single reaction arm against one fixed point. Plate-type units spread the reaction load through integrated lugs or multi-point contact against the flange face or nearby bolt heads — three or more contact points instead of one.

These tools are almost always custom-configured for specific flange bolt patterns. They pair with pneumatic or electric torque wrenches as the input source, not a hand wrench.

Manual, Pneumatic, and Electric: Power Source vs. Internal Design

Here’s where catalogs and conversations get confusing. Manual, pneumatic, and electric torque multipliers are power-source categories — not internal gear categories. All three use planetary gearing for the multiplication itself.

Manual units accept a hand torque wrench on a 1/2″ or 3/4″ female input drive. No external power needed. Output ranges from several hundred to a few thousand Nm, depending on stage count.

Pneumatic units connect an air motor to a planetary reduction gearbox. These suit production bolting where speed and volume matter alongside high torque. Output can reach several thousand Nm per tool.

Electric and battery units add microprocessor torque control to the same planetary gearbox setup. Output drives run 3/4″, 1″, or 1-1/2″ square. Battery-powered field units match pneumatic torque ranges — and you don’t need an air supply on site.

The gears inside are not different in any meaningful way. The input source and control system are what change.

Specialized Variants: Wheel-Nut Multipliers

HGV and truck work created its own subcategory. Wheel-nut multipliers are single- or two-stage planetary units tuned to ratios between 4:1 and 16:1. Output drives are sized at 3/4″ or 1″ to fit standard truck wheel-nut sockets.

The reaction arm geometry sets these apart. Industrial cylindrical units use a long, straight arm braced against a fixed structure. Wheel-nut multipliers use a short, hook-shaped reaction arm instead. It braces against an adjacent wheel nut or the wheel rim itself, sitting inside the wheel recess while the multiplier body does its work.


Matching type to task comes down to three questions:

What output torque do you need? Under 2,000 Nm — go single-stage planetary. 5,000–30,000 Nm — use multi-stage. Tight flange access — plate-type is the answer.

How much space do you have? Cylindrical units need radial clearance. Plate-type units trade ratio range for a low profile.

What’s driving the input? Hand wrench, air tool, or battery tool — the gearbox handles all three. But the housing, drive sizing, and reaction system get spec’d to match the power source.

Where Torque Multipliers Are Used (And Why Other Tools Fall Short)

Six industries keep torque multipliers in regular rotation. Each one has learned, mostly the hard way, why other tools don’t hold up.

Oil & gas leads the list. Pipeline flanges on 24″–48″ pipe sizes demand 1,500–5,000 Nm per bolt. That’s 8–32 bolts per flange. Multipliers handle that load with no hydraulic pump needed — a real advantage at remote gathering stations or mid-rig teardowns where setup time costs money.

power generation runs a close second. Wind turbine foundation bolts, turbine casings, boiler flanges — torque specs fall between 2,000 and 6,900 Nm. At the top of a tower, hauling a hydraulic power pack is not a realistic option. A compact manual multiplier rated to 5,100 ft·lb is.

Mining, heavy construction, and bridge crews face the same numbers. Track bolts, crusher bases, ASTM A325/A490 structural connections — the fasteners are large, tolerances matter, and every joint needs documentation.

Why Other Tools Can’t Cover This Ground

Versus hydraulic wrenches: torque multipliers win on portability, cost, and access. No pump. No hoses. No power pack to haul up scaffolding.

Versus cheater bars: a cheater bar has no published torque rating. No reaction arm. No way to repeat the same result. You get unpredictable force and real injury risk.

Versus impact wrenches: impacts can’t deliver a measured, documented torque value. That rules them out for flanges, structural bolts, and any joint with a written torque spec.

The multiplier fills the gap between ~400 Nm — where hand torque wrenches reach their limit — and the extreme ranges where full hydraulic systems are required. That gap is where most real-world bolting work actually sits.

How to Use a Torque Multiplier (Operating Procedure)

Getting the output torque right starts before you touch the tool. Calculate first. Act second.

Step 1: Calculate your input torque setting

Check the bolt spec. Find the required output torque. Divide it by your multiplier’s ratio.

T_wrench = T_required ÷ Ratio

  • Need 1,000 Nm? Ratio is 25:1? Set your wrench to 40 Nm.
  • Need 1,500 Nm? Ratio is 15:1? Set your wrench to 100 Nm.

Never exceed the maximum input torque printed on the data plate. That number is a hard limit, not a suggestion.

Step 2: Choose the right socket — and fit it right

Impact sockets only. Match the socket to the output drive size. No extensions. No universal joints. Both add flex, reduce accuracy, and can fail under load. Push the O-ring and retaining pin all the way in so the socket locks in place.

Step 3: Account for breakout torque before loosening

Loosening a fastener takes more force than tightening it. Breakout torque runs at 150% or more of the original tightening spec. A joint torqued to 1,000 Nm needs around 1,500 Nm to break free — that’s 60 Nm input at 25:1. Build that into your setup before you start. Don’t find out after the tool stalls.

Step 4: Position the multiplier on the fastener

Fit the socket straight onto the fastener. Keep the drive axis aligned — no angle, no side load. A cocked socket loses torque sideways and wears the output drive fast.

Step 5: Place the reaction arm — this is where most mistakes happen

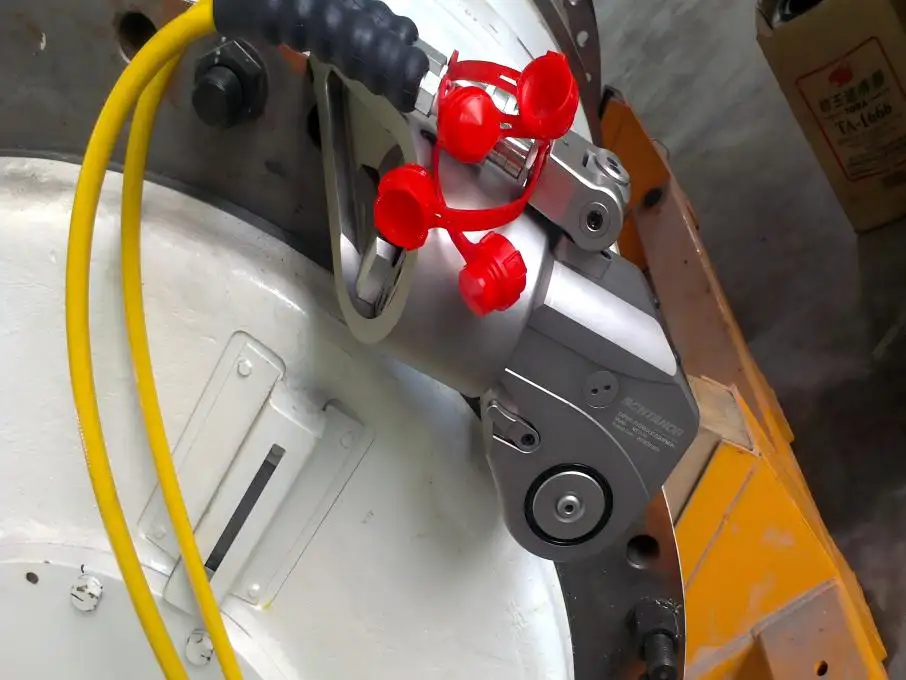
The reaction arm needs a solid, fixed structure that can take the full reaction load. Good options: structural steel, a flange body, an adjacent bolt head on the same flange, a cast axle housing.

Bad options — and people do use these — include thin guards, sheet metal covers, flexible brackets, pipes slipped over the arm for extra reach, and anything that shifts or flexes.

Keep your hands clear of the reaction zone during torque application. The reaction arm is not a handle.

Step 6: Confirm rotation direction before applying load

This one trips up experienced mechanics. The torque wrench and the multiplier output must both drive the same intended direction. But with some internal gear setups, the wrench has to rotate opposite to the output shaft.

Check the direction arrows on the housing. Do a short, low-torque test stroke and watch the fastener. It moves the wrong way? Stop. Reorient the tool before going further. A wrench set to tighten while the multiplier drives counterclockwise won’t deliver zero torque — it stores ratchet wind-up and drops it all at once, with no warning.

Step 7: Apply torque — one smooth pull

Seat the torque wrench on the input square. Check that it’s fully engaged. Then pull with steady pressure — no jerking, no pumping. The wrench clicks once at the set input value. That click means your calculated output torque has been reached.

One click. Stop there. Each extra click adds torque past your target. On precision-critical joints, that overshoot matters.

Step 8: Release the load and disengage

After the click, don’t yank the tool free. Turn the multiplier back a small amount in reverse to release stored load before you pull it off. Has the tool an anti-wind-up system? Follow the manufacturer’s release sequence — slow, controlled, in reverse. Never strike the anti-wind-up device. The energy stored in a braced reaction arm at high torque releases fast if something goes wrong.

Take the reaction arm off its contact point only after the torque load is completely gone.


Two numbers worth keeping on a card:

Scenario Required Output Ratio Wrench Setting
Flange bolt 1,500 Nm 15:1 100 Nm
Wheel nut 1,000 Nm 25:1 40 Nm

The tool does the math. You just have to set it right, brace it solid, and pull once.

Key Limitations: What You Need to Know Before Buying or Using One

Torque multipliers are honest tools. They don’t hide their weaknesses — but they don’t advertise them either.

The math will lie to you if you let it. Real output always falls short of what the ratio calculation suggests. Gear tooth friction and lubrication drag eat into every transfer. A basic estimate puts gear power loss at 1% per mesh stage — but that number shifts with gear design, pressure angle, reduction ratio, speed, and lubrication quality. No two units perform the same. Snap-on is clear on this: use a T-handle TORQOMETER at the output drive to read actual applied torque. Don’t infer it from input. Don’t rely on the raw ratio math alone.

The weakest link sets the ceiling — not the target torque. Say your torque multiplier is rated to 3,000 Nm. Your input wrench tops out at 150 Nm through a 15:1 ratio. Your real ceiling is 2,250 Nm — not 3,000. The lower-rated component is what governs. Full stop.

Reaction arm failure is the field risk most people overlook. A slipping or badly anchored reaction point doesn’t just cut output. It lets the housing rotate, throws the tool, and releases stored force with zero warning. Injuries happen here. Get this under control first.

Before buying or using one, check all six:

  • Required output torque vs. multiplier rated capacity
  • Input wrench range vs. input-side requirement
  • Manufacturer calibration factor — not the advertised ratio
  • Reaction arm fit and anchor strength at the actual workpiece
  • Output torque measurement method for verified joints
  • Application type — pressure vessel flanges and documented assemblies need calibrated hydraulic systems, not a standalone multiplier

Conclusion

A torque multiplier isn’t a shortcut — it’s the right tool for a job that brute force can’t finish. It uses planetary gear reduction to turn modest input into extraordinary output. You get precise, controlled power where oversized wrenches and impact guns fall short.

The mechanics are straightforward. Gear ratio determines multiplication. Reaction arms handle the countertorque. Proper technique protects both the fastener and you. Skip any part of that, and the tool works against you.

You now know how a torque multiplier works from the inside out. The next step is matching the right multiplication ratio to your specific application. That could be heavy equipment maintenance, structural bolting, or industrial assembly — each one has different demands.

The difference between a fastener that holds and one that fails often comes down to the tool you picked. Choose with purpose.